Tag Archives: computers

The digital natives are not who you think it is

This post got (un)popular on Hacker News. Let me just clarify that this post was meant to be humoristic and a bit tongue-in-cheek, but that seems to have been lost in translation between brain and keyboard.

I have heard the term “digital natives” applied to todays youth because they have grown up with the Internet, iPads, and whatnot. But I beg to differ. When it comes down to the meat and potatoes, they do not know jack shit.

My digital upbringing

In comparison, I grew up with the 286, 386, 486 and all the other x86’es. I learned not only about the meat and potatoes of computing; I learned the full haggis.

During my teenage years, I had computers upon computers in my room, some spilling their guts.

A harddisk located outside the computer chassis. Have the digital natives seen such a setup?

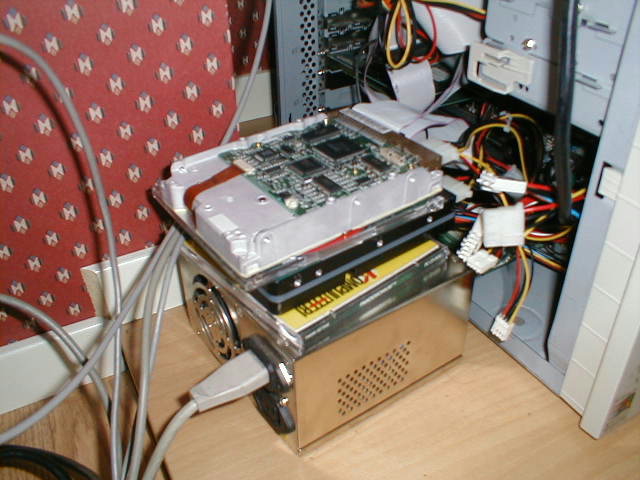
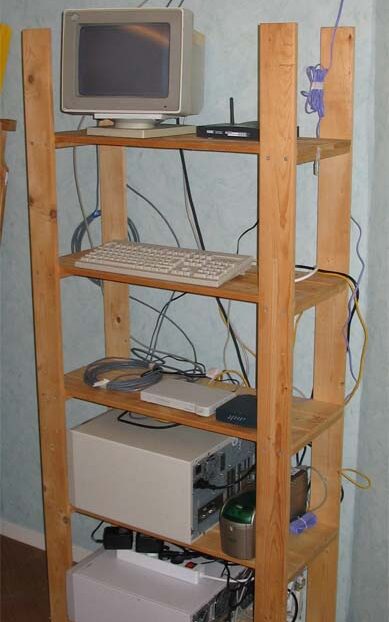
Later I had my own little server setup in the basement of my parents’ house. This was after ISDN dial-up, in the heyday of DSL technology. Look at this beauty: now this is a server rack.

Today, all of this have been reduced to a laptop in the corner running VMware’s free hypervisor, ESXi. I have one virtual machine on it, running Linux, and when the disk fail (it has happened before), I will do like any grown man without a backup would: cry. But you better take my word for it, because when it happens, this blog post will be gone with it.

Rocking that floppy

I have installed Windows 95 from floppy disks, or “the save icon” as the young kids would recognize it. Not only that, I have installed Linux on an IBM PS/2 server – again from floppies – and I got the thing online. But it is only that much you can do with a 486 on a rather obscure hardware.

This weird knowledge has helped me in career. Installing weird stuff on weird stuff. Making DOS talk to Novell NetWare. Write small custom programs to deal with big proprietary hardware.

Digital natives my ass, all they do is stream videos on YouTube and Twitch. Let me share my digital upbringing in full by showing you this image:

A desk filled with computers, monitors and various other computer related items. Early 2000.

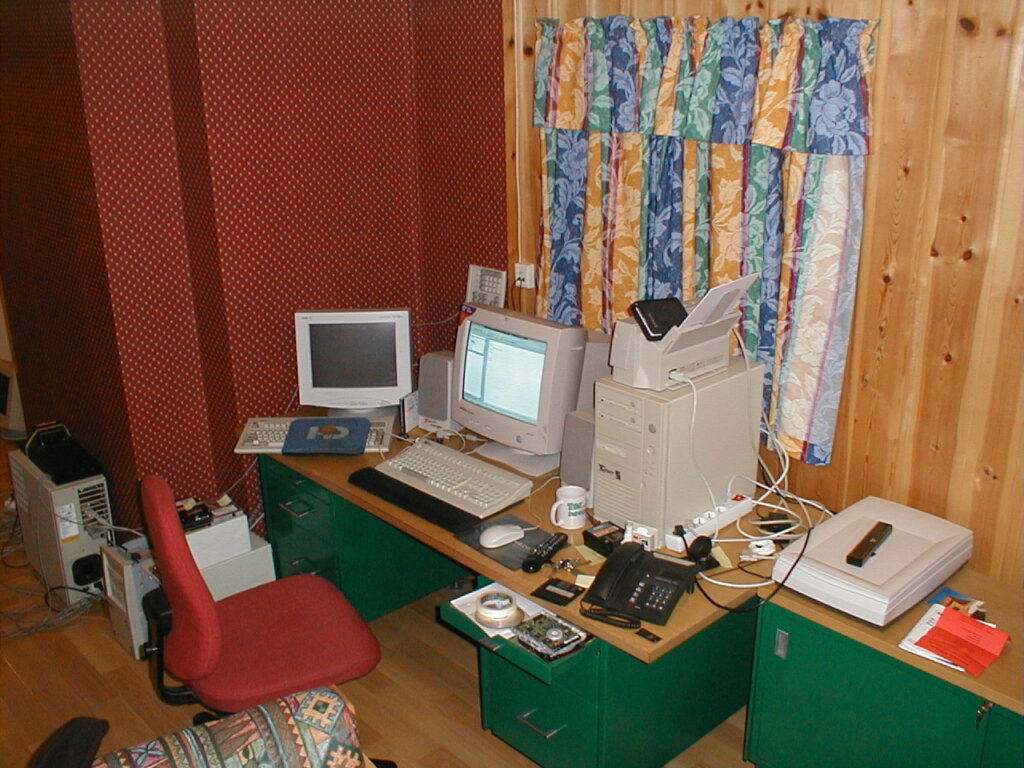
On the far left you can spot an IBM PS/2 server with a 100 Mbit hub on top with a custom power supply, the original failed during a thunderstorm. Then there is a Linux “server”, the one with the guts hanging out on the first image. Finally, on the desk, my main computer at the time, a 230 MHz(?) machine with Windows 98 running.

If anybody is a digital native, it is me. I did not just grow up with computers, I grew up alongside them.

Running VMware ESXi Hypervisor

This guide applies to VMware ESXi 3.5.0

VMware ESXi is a free Hypervisor from VMware. In simple terms, a host for virtual machines. The difference from VMware Server, which also is a free Hypervisor, is that ESXi runs directly on the hardware whereas VMware Server need to run on top of another operating system.

When I first started thinking about virtualizing my home server, I initially though about VMware Server. Simply because that was the only free alternative I knew about. It was only when I attended a VMware Infrastructure course a few weeks ago I learned about ESXi. What intrigued me about ESXi was the fact it could boot from a USB pen drive.

But where VMware Servers can use of all the hardware available to the underlying operating system, ESXi has very limited hardware support. However, rules are meant to be broken. Right?

Making a bootable ESXi USB pen drive:

Let’s make a bootable ESXi USB pen drive. The easiest way to do this is using Linux and some more or less standard programs. You can also do this on Windows, just follow this guide from Yellow Bricks which is the guide I used to make this one.

  1. Download the free ESXi ISO-image from VMware. You need to register so you can get your free licence code.
  2. Mount the ISO-file. ( “mount -o loop ESXi.iso /mnt/iso” )
  3. Extract “install.tgz” ( “mkdir /root/esxi; tar xvf install.tgz -C /root/esxi” )
  4. Go to the directory where you unpacked the files, and then some. ( “cd /root/esxi/usr/lib/vmware/installer” )
  5. Unzip the big-file. (” bunzip2 VMware-VMvisor-big-3.5.0_Update_3-123629.i386.dd.bz2“)
  6. Place this image onto your USB stick. This WILL destroy all data on the USB pen drive. Also, you need to know which device your pen drive is. Mine was “/dev/sdb” ( “dd if=VMware-VMvisor-big-3.5.0_Update_3-123629.i386.dd of=/dev/sdb” )
  7. Step 6 will take a while since we’re writing 750MB of data to the USB-stick. When it’s finished you will have stock ESXi installation on a bootable USB pen drive. Congrats!

More hardware support.

As mentioned earlier, ESXi has very limited hardware support out of the box. However, the VMkernel itself has better hardware support which VMware doesn’t wants us to know about. You only need to find out how to enable it.

For my own part I added a 3Com network adapter, since there is no way my onboard Realtek is supported. 3Com and Intel cards should be a safe bet, but don’t take my word for it. Also I wanted to use the computers local SATA disks as datastores. Thus the hacking begin.

I used several hours on reading different websites on how to enable VMkernel to recognize my SATA controller, but I could have saved me the trouble. In the end I found a site which already had the files ready to go.

Short and simple.

  1. Download the Community Unified oem.tgz file from this lovely website.
  2. Mount the partition on the USB drive called Hypervisor1. This should be the second partition on you USB drive. Mine was “/dev/sdb2”. ( “mount /dev/sdb2 /mnt/usb” )
  3. Replace the oem.tgz file on the USB drive with the one you downloaded. ( “cp oem.tgz /mnt/usb/” )
  4. Umount and you’re done. ( “umount /mnt/usb” )

I can’t guarantee that this setup will recognize your hardware, but it sure found mine. I couldn’t have made this guide without the information I found on the Internet, so it’s time for credit:

[1] http://www.grid.org/blog/cameron/development-using-vmware-server-esxi

[2] http://www.grid.org/blog/cameron/updating-vmware-esxi-disk-dump-file

[3] http://www.yellow-bricks.com/2008/07/29/esxi-35-update-2-on-a-usb-memory-key/

[4] http://www.vm-help.com/esx/esx3i/customize_oem_tgz.php

As always, comments are appreciated.